Showing posts with label party food. Show all posts

Rainbow Jello Recipe

Photobucket

Take a look at this RAINBOW JELLO from Funky Polka Dot Giraffe. Too cute!

Wouldn't this be perfect for so many kinds of spring parties.... anything colorful with rainbows like garden parties, rainbow parties, or even Wizard of Oz parties. You could even go more pastel for Easter parties. Oh, I get so excited when I think of all the ways to use colorful food! Having a Buzz Lightyear party? How about a blue, green, yellow and orange jello combo. A Strawberry Shortcake party.... red, pinks and white. A pool party.... different shades of blues...... this recipe is so versatile.

So now for the how-to.....

RAINBOW JELLO INGREDIENTS:

- Five 6 oz boxes of Jell-O in 5 different colors
- Two boxes of Knox Gelatin
- One can sweetened condensed milk

Mix 3 packages of Knox gelatin in 1 1/2 cups boiling water until dissolved. Add sweetened condensed milk to Knox gelatin mixture and set aside. Mix 3 packages of Knox gelatin with 1 1/4 cups boiling water until dissolved and set aside. Dissolve 1 box of Jell-O in 1 cup boiling water. (She started with blue because she wanted it on the bottom. You may begin with the color of your choice.) Add 1/4 cup of the Knox gelatin mixture to the Jell-O and pour into a 9"x13" glass dish.

Let the Jello layer set in the refrigerator for 20-30 minutes. Pour 3/4 cup sweetened condensed milk mixture over the Jell-O layer. Let sweetened condensed milk layer set up in refrigerator for about 10 minutes. While waiting, repeat Step 3 with the next color.

Repeat Steps 3-7 with the remaining four flavors. (NOTE: Don't try speeding up the process by using the freezer).

Photobucket

Colorful Party Bites - Coconut Ice

Photobucket

I've been super busy lately putting together my middle daughter's 10th birthday party table, and I've been a little obsessed with trying to find colorful party food. Color was a big part of her party theme.... (hint, hint.... the big reveal will come soon!). I searched high and low for easy recipes that I could tint to just the right shade of her party colors, and in that search I came across this fabulous little creation on Mini-Eco. Kate made these with her son as a fun, no-bake treat that was easy to put together with a 3 year old. If a pre-schooler can do it, I think we all can, too!


Here's the recipe:
1 14oz bag of coconut, dessicated (see below)
1 lb of powdered sugar, sifted
1 can of condensed milk
1/2 teaspoon of food coloring

To Dessicate Coconut:
Preheat oven to about 250 degrees Fahrenheit. Place the baking sheet with coconut shreds and bake for approximately 5-8 minutes. The actual baking time depends on the moisture content of the coconut meat and the size of the coconut shreds. You can check the coconut pieces if complete dehydration is achieved or not. Once done, the dessicated coconut is dry and crispy to touch. If necessary, you can bake for another 2-3 minutes to get the desired dryness. After it is dry and cooled a bit, grind it in a blender to achieve a fine powder.


To make Coconut Ice:
In a large bowl, stir the dessicated coconut, powdered sugar and condensed milk together until you have a stiff, sticky mixture. Remove half the coconut ice to a clean bowl and add the food coloring, then stir again until the color is blended in smoothly. You may find it easier to mix with your hands as the mixture will be very stiff.

Line a small rectangular dish with cling film, making sure there is plenty overhanging at the sides. (Later, you will fold these overhanging bits over to cover the coconut ice.) Grease the cling film with a few drops of vegetable oil. Take the white portion of coconut ice and pack it firmly into the lined dish, making sure you produce an even layer. Pack the colored portion into a neat layer on top of the white layer. They will stick together firmly, thanks to the amazing adhesive qualities of sugar and condensed milk. Fold the cling film over the top and refrigerate the coconut ice overnight.

When the coconut ice is nice and firm from the fridge, turn it out of the dish, using the cling film to help, and peel the film away. Chop into little squares (a serrated knife is useful here), dust with powdered sugar and pack in wax paper.
Recipe adapted from Gastronomy Divine


I just love this idea! Coconut ice in a rainbow of colors would be so pretty on a party table. I can just see it on skewers or even packaged up as a yummy take home party favor. It's the perfect way to coordinate party colors and enjoy a sweet treat, too.
Photobucket

Pot of Gold Cupcakes

I love a lady who makes really cute desserts, especially the ones that look like a million bucks but are really super easy to make. Kristan from Confessions of a Cookbook Queen is one of those girls, and today I'm sharing her oh, so cute Pot of Gold Cupcakes.

Photobucket

Aren't these adorable? She featured them for a little St. Patrick's Day celebration idea, but how perfect would these be for rainbow parties or Wizard of Oz parties, too?


Photobucket

Kristan makes good use of easy to find grocery store candies like licorice, mini m&m's, dark chocolate candy coating and doughnut holes to create the most adorable decorations for her St. Patty's Day green cupcakes.

She says, "I cut some inexpensive wooden skewers in half, inserted them in donut holes, and dipped in melted candy. I used dark chocolate candy melts, colored with black candy coloring (I usually buy my candy coloring at Hobby Lobby or Michaels).

Stick the skewers in a block of styrofoam or floral foam and while wet, attach a cut piece of black licorice and yellow mini M&M's. Make sure the M&M's don't all lay flat--you want some of them standing up to give dimension. Once set, stick skewers in cupcakes frosted with green frosting. I sprinkled my frosting with these pretty green sugar pearls."

Ingenious, don't you think? To save a little more time, you could even buy the cupcakes from the grocery store, too, and then it's just a matter of making the pots of gold. Adorable!

Be sure to visit Kristan's fun website -- she's got so many fabulous, easy creations from her kitchen and she's sure to bring out a belly laugh, too!

Photobucket

Lollipop Cookies

Color is definitely catching my eye these days when I'm blog hopping for party ideas. And these play dough cookie lollipops were a real find. I love anything that's easy to make and adapt to your own party colors. A simple recipe, a little food color and you've got a perfect party table treat.

There are quite a few versions of these on the web, including the ones above from Blogoye with a step-by-step photo tutorial, but unfortunately the directions are in Serbian and a wee bit difficult for this Southern girl to understand. Which, in turn, led me straight to this great photo.....

Evite.com has a Flickr site with another set of step-by-step photos using a recipe for Play Dough cookies from All Recipes.

Here's what you'll need:
3/4 cup butter, softened
3 ounces cream cheese
1 cup white sugar
1 egg
1 teaspoon vanilla extract
2 3/4 cups all-purpose flour
1 teaspoon baking powder
1/4 teaspoon salt
assorted colors of paste food coloring
24 lollipop sticks

First, you'll need to cream the butter, cream cheese and sugar until fluffy. Add egg and vanilla and beat until smooth. In a medium bowl combine flour, baking powder and salt. Add dry ingredients to the creamed mixture and stir till soft dough forms.


After making the basic dough, divide it into separate bowls and tint each with food color to achieve your desired colors. Wrap each bowl with plastic wrap and refrigerate for 2 hours. After the dough chills, roll each color into 3/4 inch dough balls.


Next press your colored dough balls together into one larger ball and then roll into a 12" long snake as pictured below.


Take your snake and coil it around into a 2 3/4 inch round cookie. Place on a lightly greased baking sheet, 3" apart and insert a lollipop stick into each cookie. Bake at 350 degrees for 8 minutes or until lightly browned.


Adorable!


And while we're talking playdough cookies, check out this great version from National Cookie Network. So cute! Rainbows seem to be taking over the party world, and you know, with such a long, cold winter, it's no wonder.

Happy Monday Everyone!
Photobucket

Rustic Thanksgiving Dessert Table

Photobucket


From traditional fruit pies and carrot cake to all things pumpkin, Thanksgiving desserts are a feast for the eye as well as the stomach. My recollections from childhood of my aunt's Thanksgiving dessert table still brings a smile to my face and a rumbling in my tummy. This year I will be entertaining my own extended family and hope to create the same sort of warm, sentimental memories for my children and all the rest of our family. With that in mind, I decided to design a little something special for my dessert table and share with all of you.

Thanksgiving brings to mind rustic charm, nuts and apples, and of course, pumpkin and chocolate. Those were a must have! And another must have was using my Thanksgiving printable collection for a that extra special touch of personalization.

Symmetry is always in style when it comes to displaying food and that was where I began. Using matching pairs of platters to display bite size desserts and pedestals to raise whole cakes and pies, I wanted to create something a bit more interesting and pleasing to the eye.


Photobucket

I used dried natural florals like wheat, dried okra pods and seed pods along with burlap, grapevine wreaths and pinecones to give a rustic air to the table. The rag tied garland also creates a feeling of rustic warmth. And the turkey made from natural grasses, leaves and small wood pieces was a real find! You've got to love Hobby Lobby!


Photobucket


Thanksgiving is all about family and I wanted to use my family's initial to personalize the decor. For my mantle display I bought a grapevine wreath from my local craft store and a chipboard "P" that I covered in moss, added ribbon and hung as a centerpiece above the fireplace. The garland is an idea that is sweeping the wedding scene right now and was made with small lengths of fabric tied and knotted onto a jute cord.


Photobucket

Individual size servings of desserts baked in jars are fun and add some flair to your dessert table. I wrapped the jars with the personalized initial bottle labels from the Shindig Parties TO GO Thanksgiving collection.

It's always fun to find something not usually used for food displays like a small cabinet or shelf and incorporate it into your dessert buffet. For this table I used an outdoor lantern to feature a special chocolate cake on a glass pedestal.


Photobucket


Photobucket

A little garnish goes a long way to making a superb looking dessert. A little cream, baked apple slices, blackberries and cinnamon and this apple pie was hard to resist!


<

Photobucket

Using buffet food labels is an easy way to add a special touch to a dessert display. These label cards are from the Thanksgiving Collection and can be used on your buffet or as placecards. They come blank so that you can write in your own food items or they can be customized to coordinate with your table.


Photobucket


Photobucket

Making your own pedestals is an inexpensive way to add interest to your dessert buffet. I took a cardboard box and covered it in green burlap. I added a brown satin ribbon accent and a food label matted with one of the Thanksgiving papers from the Thanksgiving collection. The paper is also used on the top of the box for contrast.


Photobucket

Adding flair to your display can be easy if you get a little creative. Use whole pecans to display mini pecan pies and candlestands or other pedestals to raise a whole pie like this caramel pecan apple streudel.


Photobucket


Photobucket

One of my favorite touches is the "I am Thankful for" cards garland. Set the cards out with a pen and have your guests write down something they are thankful for. Clip them onto a jute string and clip them on with a clothespin (I decorated my with a length of fabric and an acorn top). During your meal, have one of the older children read the cards aloud for everyone to hear. You can even have your guests write the date and keep them from year to year, creating a long chain of thankful memories.


Photobucket

There's not much more "fall-like" than caramel apples, and for Thanksgiving I thought I'd spruce them up a bit with some chocolate chips and pecans. Some of the best ideas are born out of necessity -- I store bought these caramel apples but the sticks provided were too short for my liking. I took a piece of corn husks (sold in packages in the Mexican food section) and wrapped it around the stick, added a touch of hot glue and cut the ends to fan them out.

I used the same trick for the display pedestal, too. This was a two-tiered piece that I owned but didn't think the little bird on it's top fit with my Thanksgiving theme. With my favorite craft tool, my hot glue gun, and a few corn husks, I created a much better suited for the season topper. I added a little burlap as a ribbon and wah-lah! A Thanksgiving themed dessert stand.


Photobucket


Photobucket

I hope you enjoyed my dessert table, and I truly hope it inspires you to create something special for your own family Thanksgiving this year.

And remember, the Thanksgiving Printables Collection is on sale now 40% Off in my Etsy shop -- get yours today!
Linked to: Skip to my Lou, Tater Tots and Jello, CRAFT, Just a Girl

Decor Mamma, Craft-o-Maniac, Under the Table and Dreaming

Photobucket

Crazy, Spooky Cupcakes (and more)!

I can't stop grabbing great ideas from the internet (it's a problem..... I know) but there's still time before Halloween to get a few treats in! And I'm figuring there are probably lots of you out there who relish in all these spooky little treats, too. So go ahead..... let these cute ideas inspire you to whip up a zany treat for a class party or even a fun dessert for your family this week.


How about this creepy, crazy monster cupcake from My Sweet and Saucy ?

Who wouldn't want to did into that? And it's chocolate!

You can't possibly go wrong with chocolate.

Candy Corn Cupcakes from the Curvy Carrot - Yummy!!
These are so pretty, but really a pretty simple idea.


You might even win a few 10 year old boys over with this Zombie Hand Cupcake

from Sweetest Kitchen featuring green, rising from the grave hand sold at Bake it Pretty. At the Sweetest Kitchen, she's even got a bloody finger cupcake...... if your interested in that kind of thing.


Right up my alley.... easy and effective -- super sweet ghost cupcakes from Life of the Party .


And these yummy brownie-ball icky spiders from Bakerella. She is truly the most amazing talent. And I think she could inspire just about anybody to ball up some cake and dip it in chocolate!


And these yummy bat marshmallow fondant sugar cookies from Sandra Downie Events.


And these aren't cupcakes, but you could put these Monster Eyeballs on a cupcake.
Or better yet, don't go to all that trouble - just serve them skewered on a stick
like she did at Bee in the Bonnett. Cute! Cute!

I hope these ideas are as fun to you as they are to me.....
now if there were only a few more hours in the day!

Photobucket


Rustic Fall Tablescape

With a slight coolness to the air (FINALLY!) around here, it's starting to feel a little like fall.... in late October! Makes me want to go out on my porch and roast a marshmallow in the fire. Seriously, that's one of the first things I think of when the change of seasons arrives here in the South.
It's always the sugar, always.

Fall brings so many wonderful things, including some great fall tablescapes seen around the web. I love the rustic feel to fall tables.... apples and pinecones, branches, browns and oranges. There are so many great ones out there, but today I wanted to show you one of my favorites from Katie Grace Designs . Katie has an amazing ability to take the ordinary and make it extraordinary. Look at these wonderful pictures -- I think she's brilliant.

Isn't it fabulous?? Katie's pine cone chandeliers are so eye-catching!
Especially mixed with the large polka dot and orange fabric.


Katie serves individual mason jars of pumpkin trifle for each guest -- such a personalized touch with the fall leaf label and the pumpkin buffet card holder she found at TJ Maxx.

I can't tell you how much I love this idea!! Like I said, Katie is brilliant when it comes to thinking out of the box and using ordinary items to make a statement. She has a wonderful how-to tutorial on her blog if you would like to make your own pine cone chandelier.


Again, the individual servings are fun and beautiful, too. These pumpkin pies add to the rustic charm of the entire tablescape.

She leaves no detail forgotten, even the spoons are adorned with fabric and raffia.

Simple hay wrapped in fabric and raffia -- simply beautiful.

The spiced tea station, where everything from the cups to the
pitchers of water were decorated in theme.... love the chalkboard how-to.


Please go to Katie's blog to see even more amazing photos of her rustic and charming fall tablescape. Congratulate her, too! She won The City Cradle Fall Tablescape Design Challenge -- Hooray, Katie!!
Photobucket

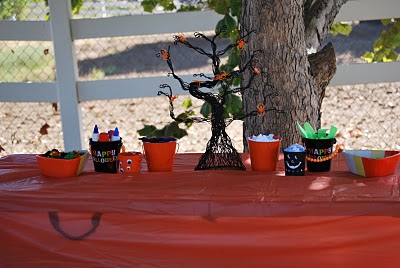
Halloween Playdate!

Feeling like you're running out of time to do something special for your kids this Halloween? No need to worry! Bri and Amy over at The Savvy Mom's Guide have it all figured out for you!

They put together an adorable Halloween playdate with just a few craft supplies
and some spooky but yummy treats. These ladies know that crafting is the way to go with kids. Give a child a craft and they are your friend for life!


I love the polka dot pumpkin and the sweet candy corn cones hanging from branches
Let the crafting begin!


Just look at these fun pumpkins. What a great memory for the children.


They are so proud of their creations!


It's always a hit to have a few games at a Halloween party -- I love how Bri and Amy took store bought balls and made an "icky" tossing game. How ingenious is the is -- a few eye balls and some soup cans and you've got yourself a winner!
A little scrapbook paper, some cans..... how simple and adorable.
Kids just love Halloween -- and I guess we moms do to! Wouldn't it be fun to throw your own little Halloween Hoopla?


Photobucket