Showing posts with label felt. Show all posts

Valentine's Soiree {A Children's Party}

Last year about this time my girls and I hosted a sweet Valentine's party for their friends. With both of my daughter's names beginning with the letter "M," I decided on a "M & M Sweet Shoppe" theme. A week or so before the party, we hand delivered some lollipop style invitations, with "M & M Sweet Shoppe" on one side and the invitation information on the other. We attached them to lollipop sticks, wrapped them up in cellophane and added a little ribbon to dress them up a bit. It was a fun way to let their guests know that something special was in store.

By using almost all store-bought baked goods and snacks and sprucing them up a bit, the party was relatively simple to put together and easy on the budget, too. I had set a budget of $100, and came pretty close to that figure in the end even with the crafting supplies added in.

Photobucket

I made the cupcakes and cake myself, which saved some money as well. It was my first experience using marshmallow fondant, and I have to say, it wasn't all that difficult, even for a newbie, and it tasted great! I've heard horror stories about the "cardboard" taste of fondant, but with this recipe, marshmallow fondant makes a pretty tasty treat. I made my own rice crispy treats, too, but added a little melted white candy coating and sprinkles to the tops for color.


Photobucket

I used Oreo cookie sticks and Pepperidge Farm Milano cookies and covered those with white chocolate candy coating and sprinkles as well. The pudding parfaits were a combination of store bought pink (cotton candy flavor) pudding and some vanilla pudding tinted red that I made at home. I added a little whip cream on top and put the parfaits in champagne glasses which, of course, the girls loved.

Using various red and pink candies in jars and adding some sweet labels really dressed up the dessert table, as did the pink and red poms that I made from tissue paper to hang over the table. A few M&M's, some Hershey's kisses and some marshmallow twist lollipops I bought at Walmart rounded out the treats.

Photobucket

After a few snacks, the girls were ready to begin crafting. I created a simple project for them and had all of the supplies ready and cut out before the girls arrived that day. Each child had a small terra cotta pot filled with green tissue paper, and they were to make their own Valentine's rose bouquet to take home with them. I used white, pink, hot pink and red felt and cut out circles for the roses. Then on each circle I drew a spiral from the outside edge, circling around until I reached the center of the circle. Then I cut each spiral out.

It was a little time consuming since each girl needed 6 or 7 roses to finish the vases, but it was a simple task that I worked on while watching TV one night. And I have to say, if you're going to have crafts with kids, it's always worth the extra effort to have the craft supplies ready to go at party time. Then it's just a matter of a few easy directions and a few steps for the kids, and they've created their own little masterpiece.

It was such a wonderful party and so nice to have a little "girl-time" with my kids and their friends. I hope it inspires you to throw a little girly soiree of your own!
Linked to: Craftomanic, Skip to My Lou, Making the World Cuter, Blue Cricket Design, Tip Junkie, Life as Lori, My Delicious Ambiguity, House of Hepworths, Craft Edition, Today's Creative Blog, Crafts Keep Me Sane, Under the Table and Dreaming, Funky Junk Interiors, Tater Tots and Jello, The Girl Creative, Sumo's Sweet Stuff
Photobucket

Valentine's Door Ideas

It's almost the season for "LOVE" and if you're anything like me, you're still tackling getting Christmas up and in the attic. (Yes, that what happens we've you've got three kids and a fun new business). So I figured the best way to get me motivated to get all my Christmas decorations organized and packed away is to start thinking about decorating for Valentines. As I researched the internet for DIY Valentines ideas, I came across some really great tutorials for door decorations that I thought I'd share with you today.

Door wreaths and other door hangers are fabulous holiday decorations because once made, they can last for years to come. And I have to say, most of what you find for Valentines in the stores is a little too cheesy for my taste -- thank goodness for all these amazingly talented ladies posting their ideas on the internet! Now with a few simple supplies and a few hours time, we can all make gorgeous Valentines decor.


I loved the simplicity of this ribbon covered wreath fro Domesticated Lady,
using a green styrofoam wreath and a felt flower tutorial from Keeping Life Creative.


Life in the Thrifty Lane makes a gorgeous felt rose door hanger using a cardboard box cut into the shape of a heart. Adding a few rhinestones to the flowers really makes this beauty stand out.


Danielle is Nesting made a beautiful rose bouquet door hanger.

Just a few supplies is all you need for this sweet Valentines project..... a wire cone shaped hanger, felt roses from the dollar store, a piece of florist foam and some moss.


Sweet Bee Buzzings made a fabric wreath using pieces of coordinating red and pink fabrics cut into small strips and tied onto a 10" wire circle frame from the craft store.


And Wise Old Owl Designs has a cute idea, similar to the one above, using a wire hanger shaped into a heart for a frame.

Most of these fabulous projects have tutorials on the ladies' blogs, so hop on over to find out the details. Have a great day today everyone!
Photobucket

My Favorite Christmas Tradition -- The Advent Calendar

One More Day -- Yay!! That is, one more day until we start my favorite holiday tradition -- The Advent Calendar.

One of my sweetest memories from childhood was the advent calendars that we would buy every year when visiting my aunt in Florida for Thanksgiving. There was an amazing Christmas shop there open year round in a wonderful, old house. It was a treat for the eyes, especially for us kids!

These kinds of stores are everywhere these days, but back in the 70's it was an anomally and a real special treat. Surrounded by Christmas trees in all shapes and sizes and colors and of course, all of the thousands of ornaments and holiday candies, I was in complete awe. But my favorite things were always the advent calendars. And the funny thing was, they were nothing more than cardboard with a printed Christmas scene. No prizes, no candy, just little perforated cardboard doors that you would punch out each day of December counting down to the BIG one. It amazes me to this day how much enjoyment I got out of waiting day to day to see what little picture was behind that door!

I have always made advent calendars a part of my own children's Christmas traditions, but it usually took form in "the easy way out"..... the Dollar Tree cardboard advents with a small piece of chocolate each day for a prize. And then last year I decided to create something really special for them, something that I hoped would last for many years to come. I wanted an advent that was large enough to hold some small prizes, and I also wanted to handmake something so that they knew it really came from Mommy's heart..... just for them.

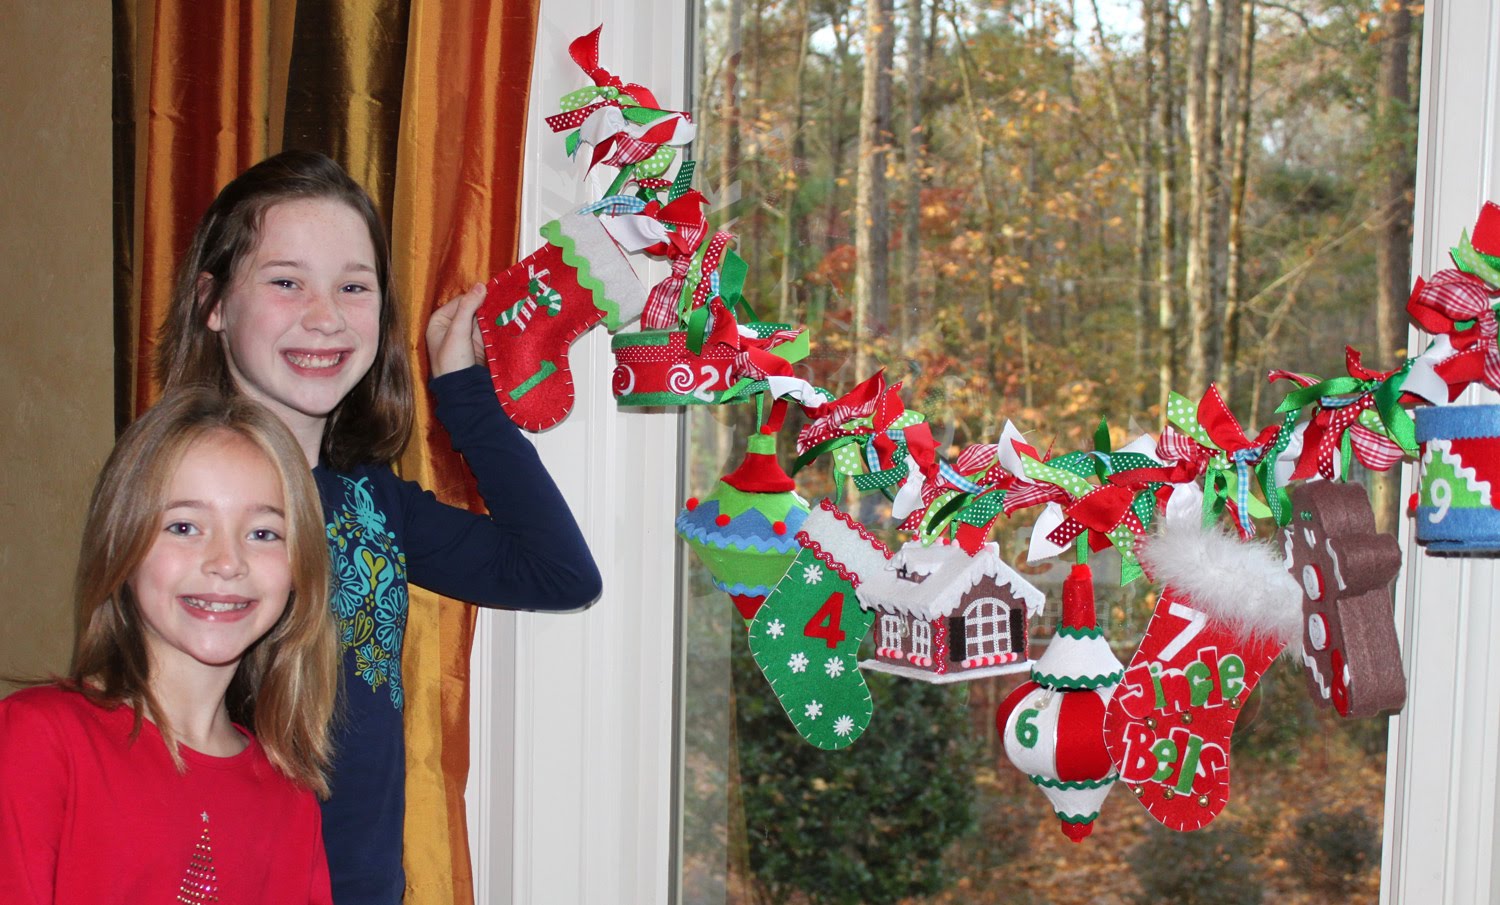
This is what I came up with.


I took various paper machie' holiday forms from Hobby Lobby like drums, gingerbread houses, ornaments, boxes, books, etc and covered them with felt and other decorations. I also used some pre-made felt stockings that I added feather boas, ribbons, ric-rac, and other fun things to.

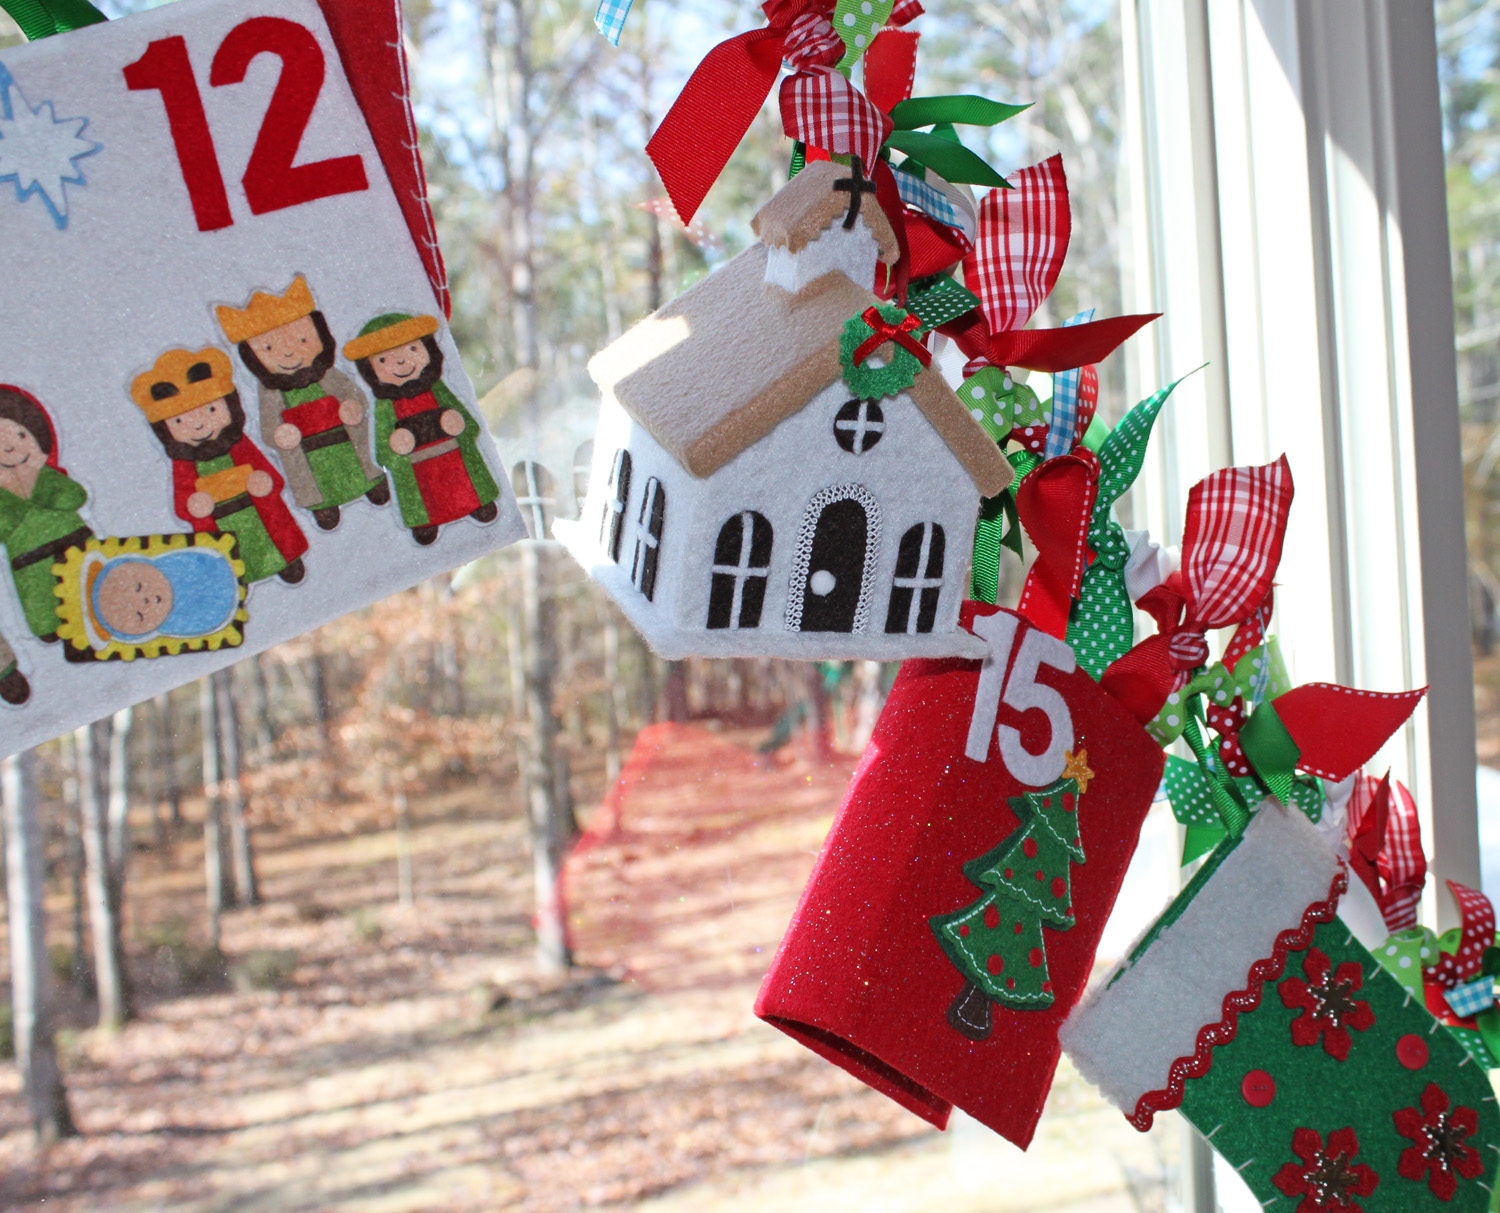
Here are some close ups. I bought most of the felt decorations like snowflakes, the nativity, the Christmas tree, etc. I traced the numbers onto felt and cut those out myself. I also made all of the windows, doors and crosses for the church.


I bought the snowman felt piece but added the number 19 that I cut out of felt and the ruffled ribbons at the top of the stocking myself.

For the gingerbread house, I used a lacey trim, some felt and small felt balls that I hot glued on to the house. I found some very small candy cane ornaments at Hobby Lobby which were actually small Christmas tree ornaments. I cut off the little hanger at the top and glued them around the door of the house.


I strung all of the pieces onto a ribbon and added tied pieces of ribbon in between each advent piece. Every night before the next advent day, I fill the day's advent piece with small prizes, pieces of candy or a note with a fun activity for the day. I can't tell you how excited my children get over this! It was worth every moment of time that I put into it.

Which leads me to the next little tidbit of information for you..... It took about a month last year to make -- it's not for the faint of heart! But it is a cherished holiday tradition and I hope a piece that will be used even when my own kids have their children.

Just look at how happy they are! And it makes the morning routine a little easier, too. I make them do all of their "getting ready" activities first before they can run over to the advent..... amazing how quickly they can get things done when there's a little motivation!


I hope you will all create your own advents this year, whether elaborate or simple, it's a wonderful way to celebrate the season each and every day.

Linked to: Some What Simple, House of Hepworths, The Shabby Chic Cottage, Beyond the Picket Fence, Life as Lori, Blue Cricket Design, Me and My Bucket, Domestically Speaking, Just a GirlSkip to my Lou, Tater Tots and Jello, CRAFT, Todays Creative Blog, Under the Table and Dreaming, Between Naps on the Porch, The Tidy Mom, Craftomaniac,, The Idea Room, Tip Junkie, Making the World Cuter, The Shabby Nest, Fingerprints on the Fridge
Photobucket


Photobucket