
Remember this little table runner from my Shindig Thanksgiving dinner table featured earlier this week? Well, today I'm back with a little tutorial on how to make it.
But first, I wanted to remind everyone about the FREE Thanksgiving Kids' Table Printables deal I've got going on. 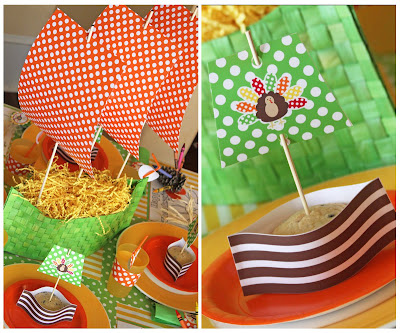
Aren't they cute? And there are lots of files in the collection, too -- FREE!
Just become a FAN of Shindig Parties TO GO on Facebook by clicking the "like" button, send me your email with the SECRET CODE (found on my Facebook page by clicking the "Discussions" tab at the top of the screen).

Just become a FAN of Shindig Parties TO GO on Facebook by clicking the "like" button, send me your email with the SECRET CODE (found on my Facebook page by clicking the "Discussions" tab at the top of the screen).
Now.... back to the corn husk runner..... I've had quite a few people asking to purchase it, but it's so simple to make that I think I'll just show you how and help you make your own. Just think of how proud you'll be to make it yourself!
Start with getting your materials together. I made mine with a sewing machine, but it would be possible to make a similar version with a no-sew method. You just have to get a little creative -- I'll tell you about that later in the post.
You'll need the following for an 8-9 foot runner:

STEP 2: Sewing the Corn Husks on --Now that everything is cut, you'll start working on the main part of the runner and sewing your corn husks on. Take the 2 big pieces of burlap for the top and bottom of your runner and your corn husks (separate them into individual pieces) over to your machine. Line your burlap pieces up one on top of the other and place a corn husk in between. Begin sewing these 3 pieces together.
 STEP 3: Repeat Step 2 over and over again. Add a corn husk in between your fabric pieces and sew down. Repeat all the way until the end of the burlap runner strip.
 STEP 4: Finishing off the end of your runner -- When you get to the end of your burlap strip, just roll the burlap two times to covered the frayed end of the fabric. Now cut your threads and take your runner to the ironing board. Continue to roll the fabric at the end of the runner over twice to hide the frayed end and iron it down. Go back to the sewing machine and topstitch over the end of the runner to create a nice, finished edge to your runner. Now go and do the same thing to the other end of the runner, finishing the edge of both ends.
Next it's time to sew the corn husks to the other side of your runner. Turn the runner around to repeat sewing the corn husks in between the two layers of burlap. When you're done with this step, you'll have a burlap runner with corn husks going down each side.
 STEP 5: Making your burlap ruffle -- Take your small burlap strip pieces for your ruffle and using a wide zig-zag stitch, sew back and forth over a piece of dental floss (excellent to use for making a quick and easy ruffle). Zig zag all the way to the end of the strip, being careful not to actually sew onto your string. Once your done, cut your threads, leaving a longer piece of dental floss at each of the strip. Carefully pull on your dental floss to start creating small ruffles along your burlap strip.
 STEP 6: Attaching your ruffle - Get your ruffle approximately the same length as your runner by pulling on your dental floss and adjusting your fabric. Once they are about the same length you can begin to sew the ruffle down. Turn the end of the ruffle strip under the back side of the runner to begin sewing. Now just top stitch the ruffle all the way down to the end of your runner. Finish off the ruffle ends like you did before and you are done, my friend.

And in the end, this is what you'll have. Yay, you! You did it!!
 Isn't it pretty??
Linked to: Some What Simple, House of Hepworths, The Shabby Chic Cottage, Beyond the Picket Fence, Life as Lori, Blue Cricket Design, Me and My Bucket, Domestically Speaking, Just a GirlSkip to my Lou, Tater Tots and Jello, CRAFT

Start with getting your materials together. I made mine with a sewing machine, but it would be possible to make a similar version with a no-sew method. You just have to get a little creative -- I'll tell you about that later in the post.
You'll need the following for an 8-9 foot runner:
- 3 yards of natural colored burlap
- sewing thread to match
- 2 bags of corn husks (I bought mine at Walmart in the Mexican food section)
- scissors
- dental floss
- sewing machine and iron
FIRST: The cutting -- Cut your burlap into 8-9 foot long lengths by 13" widths. You'll need two pieces, one for the top of the runner, one for the liner. Now for the burlap ruffle on top of the runner, you'll cut strips of burlap from your remaining original 3 yard piece that are 2" x the length of the runner pieces that you previously cut. Cut 4 strips out (they will be 2" x 8-9 feet each).
Go to your sewing machine and sew 2 strips together, end to end, to make one very long strip to be used for your burlap ruffle. Now repeat with your other 2 strips. You'll end up with two long strips 2" x 8-9 feet each.

STEP 2: Sewing the Corn Husks on --Now that everything is cut, you'll start working on the main part of the runner and sewing your corn husks on. Take the 2 big pieces of burlap for the top and bottom of your runner and your corn husks (separate them into individual pieces) over to your machine. Line your burlap pieces up one on top of the other and place a corn husk in between. Begin sewing these 3 pieces together.
 STEP 3: Repeat Step 2 over and over again. Add a corn husk in between your fabric pieces and sew down. Repeat all the way until the end of the burlap runner strip.
 STEP 4: Finishing off the end of your runner -- When you get to the end of your burlap strip, just roll the burlap two times to covered the frayed end of the fabric. Now cut your threads and take your runner to the ironing board. Continue to roll the fabric at the end of the runner over twice to hide the frayed end and iron it down. Go back to the sewing machine and topstitch over the end of the runner to create a nice, finished edge to your runner. Now go and do the same thing to the other end of the runner, finishing the edge of both ends.
Next it's time to sew the corn husks to the other side of your runner. Turn the runner around to repeat sewing the corn husks in between the two layers of burlap. When you're done with this step, you'll have a burlap runner with corn husks going down each side.
 STEP 5: Making your burlap ruffle -- Take your small burlap strip pieces for your ruffle and using a wide zig-zag stitch, sew back and forth over a piece of dental floss (excellent to use for making a quick and easy ruffle). Zig zag all the way to the end of the strip, being careful not to actually sew onto your string. Once your done, cut your threads, leaving a longer piece of dental floss at each of the strip. Carefully pull on your dental floss to start creating small ruffles along your burlap strip.
 STEP 6: Attaching your ruffle - Get your ruffle approximately the same length as your runner by pulling on your dental floss and adjusting your fabric. Once they are about the same length you can begin to sew the ruffle down. Turn the end of the ruffle strip under the back side of the runner to begin sewing. Now just top stitch the ruffle all the way down to the end of your runner. Finish off the ruffle ends like you did before and you are done, my friend.
 It's actually really easy to make. Somehow writing all the steps down makes it seem a little more complicated, but it's really not. Don't be afraid -- just do it, girls!

And in the end, this is what you'll have. Yay, you! You did it!!
And now you'll have quite the conversation piece for your family Thanksgiving meal.
 Isn't it pretty??
 And if you like those pretty cards and candle wraps on the table, make sure to check out my Thanksgiving Printable Collection -- a huge set of everything you need to set a beautiful, personalized Thanksgiving table this year -- it's on SALE NOW over 50% OFF!
FOR A NO-SEW METHOD: I think it's possible to make a similar version of this runner by using hot glue instead of a sewing machine if you don't sew. Follow all the same steps in cutting out your main pieces of the fabric runner and glue the corn husks in between the two pieces of burlap instead of sewing them. Then you may want to buy some ribbon, may brown grograin, and glue it on top of the burlap at the seam with the corn husks. It will add a little decorative touch -- not a ruffle necessarily, but I think it would still be pretty cute.
Linked to: Some What Simple, House of Hepworths, The Shabby Chic Cottage, Beyond the Picket Fence, Life as Lori, Blue Cricket Design, Me and My Bucket, Domestically Speaking, Just a GirlSkip to my Lou, Tater Tots and Jello, CRAFT


